

Making my oven-baked chicken breast is incredibly easy and quick! For these incredibly delicious, fail-proof chicken breasts, all you need is a little olive oil, a unique spice blend, and some insider knowledge. It's easy, quick, and really delicious! It works well for meal preparation, as a salad topper, in chicken sandwiches, and as a main course.

Recipe at a Glance
- Oven temperature: 400°F, with the rack positioned in the center of the oven.
- Bake time: 18 to 22 minutes, depending on how big the breasts are.
- Doneness: 165°F in the thickest section, using an instant-read thermometer.
- Resting time: 5 minutes before slicing.
- Good to know: Naturally low-carb and free of dairy and gluten, as long as your spice blend has no fillers.
Why This Baked Chicken Breast Works
A few minor details separate juicy, tasty chicken from dry, boring chicken.
- Even thickness: By pounding the thick end flat, the entire breast cooks simultaneously, preventing the thin end from drying up while the center catches up.
- A seasoning paste: A paste that sticks to the chicken, browns in the oven, and flavors every bite is created by first combining the spices with the olive oil.
- High heat: The chicken is done in about 20 minutes at 400°F, where the outside browns quickly and the inside remains moist.
- A thermometer and a short rest: The juices stay in the flesh rather than on the chopping surface when the chicken is taken out at 165°F and allowed to rest for five minutes.
Baked Chicken Breast Ingredients
This recipe for baked chicken breasts requires the following ingredients:
- Chicken Breasts - You can buy frozen chicken breasts (which you must fully thaw before using) or fresh chicken breasts (which is what I prefer). To ensure equal cooking, always make sure to select chicken breasts of roughly the same size and pound them to a uniform thickness. The cooking time may need to be modified based on the size of the breasts.
- Olive oil - The chicken is lightly oiled to help the seasonings adhere. Olive oil also aids in browning. You can use any oil with a mild flavor.
- Seasoning - It's a straightforward mixture of salt, pepper, Italian seasoning, garlic powder, onion powder, and paprika for color. You can use smoked paprika, which goes with almost anything, or sweet paprika. However, you are welcome to use any dry seasoning blend you like. Your preferred seasoning blends, such as Cajun seasoning, Greek seasoning, or a basic lemon pepper blend, can be used.
Baked Chicken Breast Video Tutorial
Watch as I demonstrate how to bake chicken breasts to perfection. For lunch, supper, or meal prep, this recipe yields juicy, delicious chicken breasts.
Equipment You'll Need
- Rimmed baking pan: It collects the juices so you can pour them back over the chicken, and a sheet of parchment makes cleanup simple.
- Meat mallet or rolling pin: To achieve a uniform thickness, use it to gently pound each breast's thick end.
- Instant-read thermometer: It is the only trustworthy method for determining whether the chicken is done without slicing it.
- Small bowl and pastry brush: You'll use them to combine the seasoning mixture and apply it uniformly to both sides.
How To Cook Baked Chicken Breasts
- Place a rack in the middle of the oven and preheat it to 400°F. Line a rimmed baking pan with parchment paper or lightly oil it.
- In a large bowl, combine the paprika, onion powder, garlic powder, Italian seasoning, salt, and pepper. Then, add olive oil until well combined.


- The chicken breast should be placed on your chopping board. Cut off extra fat. Then lay a piece of plastic wrap or parchment over the chicken to avoid spatter, gently pound the thicker end of the chicken breasts with a rolling pin or the flat side of a meat tenderizer.
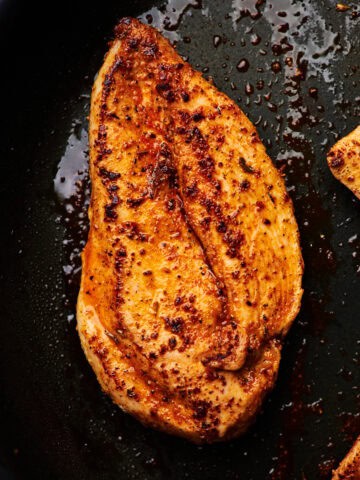
- The seasoning mixture should be uniformly brushed over the chicken on both sides, flipping once.
- Place the chicken breasts in the baking pan and bake for 18 minutes, or until the internal temperature reaches 165°F on a thermometer.


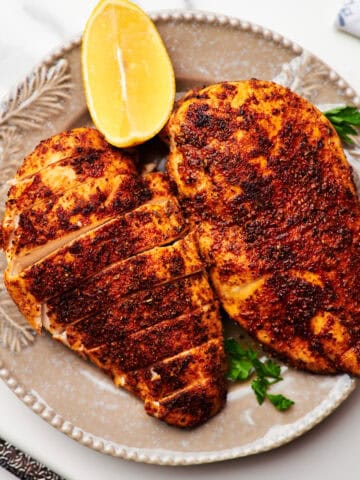
- After cooking, take the pan out of the oven, move the chicken to a plate or chopping board, and let it rest for five minutes before slicing.
- Drizzle the pan juices over the chicken before serving, and sprinkle some freshly chopped parsley on top.
- Pat dry first. Remember to use paper towels to pat the chicken dry on both sides since dry meat absorbs flavor more effectively than wet meat.
- Tent with parchment. To enclose the breasts and preserve moisture during baking, cut a sheet of parchment paper about the same size as your baking dish and cover the chicken with it so that the sides wrap down.


How Long To Bake Chicken Breasts
The size of your chicken breast and your specific oven will determine how long it takes to cook. There are minor heat variations in some ovens. Pulling the chicken breast when the thermometer registers a safe internal temperature of 165°F is the secret to cooking it without drying it out. Here is a general rule to abide by:
Cook 5 ounce small breasts for 18 minutes. Cook 7 ounce medium breasts for 20 minutes. Cook 9-ounce large breasts for 22 minutes.
- Baking at different temperatures: Use the chart below as a guide if you have another item in the oven at a different temperature. The only method to determine when the chicken is done is still to use a thermometer.
| Oven temperature | Bake time (5 to 9 oz breasts) |
|---|---|
| 350°F | 30 to 35 minutes |
| 375°F | 25 to 30 minutes |
| 400°F (this recipe) | 18 to 22 minutes |
| 425°F | 16 to 20 minutes |
| 450°F | 15 to 18 minutes |
How to Tell When Chicken Breast Is Done
An instant-read thermometer is the simplest and safest method. Slide the probe from the side into the thickest area of the breast, being careful not to touch the pan, and remove the chicken as soon as the temperature reaches 165°F.
Cut into the thickest portion if you don't have a thermometer. When pressed, the chicken should feel solid rather than spongy, the meat should be white throughout with no pink, and the fluids should run clear. However, a thermometer is well worth the minor expense because every cut allows juices to escape.
Do I Need to Brine Chicken Breast?
Although brining is optional in this recipe, pounding the chicken breasts to a uniform thickness will naturally tenderize them and guarantee that they cook evenly for a luscious center. Additionally, the chicken gains a lot of flavor from the considerable amount of seasoning.
- Quick brine method: To brine chicken, just fill a big bowl halfway with lukewarm water, whisk in about ¼ cup of kosher salt for 2 pounds of chicken until most of it dissolves, use ice cubes or cold water to drop the temperature till it is cool to the touch, then add the chicken breasts and let them soak in the saltwater in the fridge for 15 minutes to 6 hours.
- Pre-brined chicken: These days, some store-bought chicken breasts are already brined in a sodium solution. If so, carefully review the label and skip the brining step.
- How to tell if your chicken is already brined: If you see words like "contains up to 15% solution," "enhanced with a salt solution," or "added broth" on the package label, avoid using the brine or the chicken may become overly salty.
- Salt tip: The salt amount in the brine is for kosher salt. Use around half as much if you just have table salt or fine sea salt, because fine salt is significantly saltier by volume.
Expert Tips
Since I've been baking chicken breasts for years, these pointers have helped me consistently make properly cooked chicken:
- To balance out the thickness, make sure to pound the chicken breasts thoroughly. Since one end of chicken breasts is inherently thicker than the other, you can pound the thicker portion of the breast gently to get a more uniform thickness, which will result in more equal cooking.
- Combine the seasoning and oil. I used to season the chicken breasts on both sides after brushing them with cooking oil. After plenty of trial I now prefer preparing a "seasoning paste" instead of just using dry seasoning. With a seasoning paste the oil really soaks into both the spice and the chicken and creates excellent flavor! However, before adding the oil, make sure to combine all the spices.
- Keep the chicken breasts from being overcooked. The most crucial thing is to avoid overcooking the chicken. Use a meat thermometer and pull the breast the moment it reaches 165°F - even a few degrees over will result in dry meat.
- It's crucial to rest! Before serving, let the chicken rest for five minutes. After cooking, let the meat rest so that the juices can return to the meat and keep it moist.
- Experiment with various spice mixes. You can use your preferred flavor blends with this chicken because it's so adaptable. For simple chicken tacos, use a taco seasoning first, then shred the chicken. Or prepare a quick batch of filling chicken chili using a chili seasoning. Naturally, your neighborhood grocery store carries a number of well-liked store-bought seasoning combinations. Therefore, don't be scared to discover your preferred combination.
- Tuck instead of pound: If pounding is not an option, tuck the thinner ends of the breasts under themselves to form a more uniform piece of chicken, which allows for more even cooking.
- Don't crowd the pan: Instead of putting in more than four breasts, use two dishes; otherwise, the chicken would steam rather than roast, resulting in longer cooking times and a drier end product.
- Broil for extra color: For a richer golden crust, turn the oven to broil for the final one to two minutes and keep a close eye on the spices to prevent them from burning.
- Use an oil that can take the heat: When baking at 450°F, use avocado oil or another high-heat oil instead of olive oil, which works best at 400°F.
Common Mistakes to Avoid
- Skipping the pounding: The thin end of an uneven breast dries up long before the thick end is fully cooked.
- Crowding the pan: Tightly packed pieces become pale and watery because they steam rather than roast.
- Baking wet chicken: Always pat the chicken dry first because moisture on the surface prevents the seasoning from sticking and prevents the outside from browning.
- Guessing the time: Because ovens and breast sizes differ greatly, use the times as a guide and give the thermometer the final say.
- Slicing right away: Give the chicken a few minutes to rest since cutting it right out of the oven allows all the fluids to spill onto the board.
Seasoning Variations
This recipe's spice blend is a fantastic all-purpose blend, but you can easily adjust the flavor to suit the dish you're preparing.
- Lemon pepper: Add some fresh lemon zest to the oil and replace the Italian seasoning with lemon pepper seasoning.
- Cajun: For a smokey, spicy kick, add one to two tablespoons of Cajun seasoning in place of the spice blend.
- Southwest: Slice the chicken for tacos, burrito bowls, or quesadillas after adding ½ teaspoon of cumin and 1 teaspoon of chili powder.
- Greek: Replace the Italian seasoning with dried oregano, and pour fresh lemon juice over the chicken after it comes out of the oven.
- BBQ: During the final five minutes of baking, brush the chicken with your preferred barbecue sauce to make it sticky and caramelized.

Storing and Reheating
- Storing: Any leftovers should be kept in an airtight container. Cooked chicken can be frozen for up to three months or kept in the refrigerator for up to three days in a sealed container.
- Reheating: Reheating chicken breasts over the next few days may cause them to become rather dry. Here's a quick tip: before reheating your chicken in the microwave, sprinkle it with a teaspoon or so of water and cover it with a microwave-safe lid. It will help the chicken absorb some of the moisture by creating a small amount of steam, which will revitalize it!
- Freezing: Freeze the chicken for up to three months in airtight packaging or freezer-safe containers (we prefer our food saver bags to avoid freezer burn). Before reheating, let it thaw overnight in the fridge.
Meal Prep and Reheating Tips
- Cook once, eat all week: At the beginning of the week, bake a double batch, allow it to cool fully, then chop or slice it and split it into containers for quick dinners and lunches. Use it within three days.
- Freeze in portions: To ensure you don't have to thaw the entire batch of sliced chicken, lay it flat in freezer bags.
- Reheat in the oven: Put the chicken in a baking dish with a little water or broth, cover with foil, and cook at 350°F until thoroughly heated.
- Reheat in the air fryer: Depending on how thick the pieces are, reheat the chicken at 360°F for four to six minutes.
- Add it to hot dishes: Shredded or sliced chicken can be added directly to soups, casseroles, or pasta dishes, where it will warm through the cooking process.
Serving Suggestions
You may serve these chicken breasts with a variety of side dishes. Some of my favorites are as follows:
- Blackstone Potatoes
- Air Fryer Cheesy Potato Wedges
- Air Fryer Roasted Baby Potatoes
- Oven Roasted Yukon Gold Potatoes
- Crispy Air Fryer Frozen French Fries
- Italian Grinder Chopped Salad
- Grain bowls and salads: Serve the sliced roasted chicken over your preferred grain bowl or salad, like a sweet potato avocado kale salad, Caesar salad, or regular green salad.
- Soups and pastas: Leftover baked chicken may be shredded and added to your favorite soups and chilies, or it can be sliced and chopped and added to your favorite pasta dishes, like spaghetti marinara or fettuccine alfredo.
Ways to Use Leftover Baked Chicken
One of the best items to have in the refrigerator is baked chicken breast. Here are some of my preferred ways to use it:
- Mediterranean Chicken & Rice Bowls
- 30 Minute Mini Baked Chicken Tacos
- 15 Minute Creamy Garlic Pasta
- Creamy Greek Yogurt Alfredo Pasta Sauce
- Copycat Taco Bell Chicken Quesadilla
- Italian Grinder Chopped Salad

More Ways to Cook Chicken Breast
- Air Fryer Chicken Breasts
- Pan-Seared Chicken Breast
- How to Boil Chicken Breasts
- Easy Oven Baked Thin Sliced Chicken Breasts
- Easy Oven Baked Chicken Cutlets
- Oven Baked Juicy Panko Chicken
- Blackstone Chicken
FAQs
You can bake them at 350°F instead of 400°F to prevent the outside from drying out before the center thaws, season what you can, bake for about 50% longer, about 45 to 55 minutes, and check the temperature in the thickest part before pulling, even though the texture won't be quite as good.
If you have the room, double it; use two 13 x 9-inch dishes instead of packing six or eight pieces into one; maintain the same temperature and duration; and, if the pans are on different racks, rotate them halfway through.
Yes, but keep in mind that it will take longer to cook to 165°F, so allow an additional 10 to 15 minutes. As always, use a meat thermometer.
Always use a meat thermometer, bake quickly at a high temperature, and let the chicken rest for at least five minutes before slicing to allow the juices to return to the meat.
Yes, you can cover the coated chicken breasts and refrigerate them for two to four hours, allowing the spices to seep into the chicken until every bite is bursting with flavor. Alternatively, you can let the breasts sit at room temperature for half an hour or bake them immediately after coating, and the chicken will still taste great.
No, bake them uncovered to allow the seasoning to create a light crust and the outside to brown. Steam is trapped when the pan is covered, resulting in softer, paler chicken. Tent the chicken loosely with foil to keep it warm while it rests.
Yes. Since the fan cooks the chicken more quickly, lower the temperature to 375°F and begin inspecting it a few minutes early.
Chicken that is rubbery is nearly always overdone. Pound it to a uniform thickness, remove it from the oven at 165°F, and let it rest instead of leaving it in for a few extra minutes to be safe.
Yes! In the air fryer, the same seasoning paste performs admirably. For the precise time and temperature, see my recipe for Air Fryer Chicken Breasts.
Yes. Lean and high in protein, chicken breast is kept light by baking it in a modest amount of olive oil. It works well as a foundation for grain bowls, salads, and meal preparation.

The BEST Baked Chicken Breast (Juicy!)
INGREDIENTS
- 3 boneless skinless chicken breast
- 2 teaspoon paprika
- 1 teaspoon garlic powder
- 1 teaspoon onion powder
- 3 teaspoon Italian seasoning
- 1 teaspoon fine sea salt
- ½ teaspoon black pepper
- 3 tablespoon olive oil
- 1 tablespoon fresh parsley for garnish
INSTRUCTIONS
- Place a rack in the middle of the oven and preheat it to 400°F. Line a rimmed baking pan with parchment paper or lightly oil it.
- In a large bowl, combine the paprika, onion powder, garlic powder, Italian seasoning, salt, and pepper. Then, add olive oil until well combined.
- The chicken breast should be placed on your chopping board. Cut off extra fat. Then lay a piece of plastic wrap or parchment over the chicken to avoid spatter, gently pound the thicker end of the chicken breasts with a rolling pin or the flat side of a meat tenderizer.
- The seasoning mixture should be uniformly brushed over the chicken on both sides, flipping once.
- Place the chicken breasts in the baking pan and bake for 18 minutes, or until the internal temperature reaches 165°F on a thermometer.
- After cooking, take the pan out of the oven, move the chicken to a plate or chopping board, and let it rest for five minutes before slicing.
- Drizzle the pan juices over the chicken before serving, and sprinkle some freshly chopped parsley on top.
Video
NOTES
- Storing: Keep leftovers in an airtight container in the refrigerator for up to three days.
- Freezing: Freeze the chicken for up to three months in airtight packaging or freezer-safe containers (we prefer our food saver bags to avoid freezer burn). Before reheating, let it thaw overnight in the fridge.
- Reheating: Reheating chicken breasts over the next few days may cause them to become rather dry. Here's a quick tip: before reheating your chicken in the microwave, sprinkle it with a teaspoon or so of water and cover it with a microwave-safe lid. It will help the chicken absorb some of the moisture by creating a small amount of steam, which will revitalize it!
- Bigger breasts: Bake 7-ounce breasts for about 20 minutes and 9-ounce breasts for about 22 minutes. Always check for 165°F.
- Brine (optional): For extra-juicy chicken, soak it in lukewarm water with about ¼ cup kosher salt per 2 pounds of chicken for 15 minutes to 6 hours in the fridge, then pat dry. Skip this if the label says the chicken is enhanced with a salt solution, and use half as much salt if you only have table salt.
- Extra color: Broil for the last 1 to 2 minutes, watching closely so the spices don't burn.
- Convection oven: Bake at 375°F and start checking a few minutes early.
NUTRITION
If you tried this Baked Chicken Breast or any other recipe on my website, please feel free to leave a 🌟 star rating and let me know how it goes in the 📝 comments below. And remember to tag me on Instagram!


Hailey Young says
'Fail-proof' is exactly what I need in my cooking life!
Clara Mae Johnson says
Wow, only 18 minutes? This is perfect for my family dinners!
John Doe says
I love how easy this chicken recipe is! Can't wait to try it!
Jessica says
The recipe looks so delicious! Perfect for family gatherings! Thanks for the recipe!
Naomi Silver says
I love how quick this is! Perfect for busy nights!
Tommy Lee says
I love baked chicken! Thanks for sharing this simple recipe!
Arden Whitlock says
The seasoning mix sounds delicious! I will definitely try it out.
Eliza Friedman says
Thank you for the tips! I always struggle with cooking chicken.
Bristol Vaughn says
'Drizzle the pan juices' sounds so tasty! I'll keep that in mind.
Daphne Caldwell says
Wow, such simple ingredients! I think I can handle this!
Audrey Simmons says
'Fail-proof' is exactly what I need in the kitchen. Can't wait to make this!
Mia Johnson says
I love how quick this chicken is to make. Thanks for sharing!
Anonymous says
[This comment has been left blank intentionally]
Jessica Lee says
Wow, the spice blend sounds amazing! I want to try it soon!
Emma Louise Parker says
'Fail-proof' sounds perfect for me! Can't wait to try it!
Anonymous says
'Perfectly cooked chicken' sounds amazing. I'll definitely follow your advice on cooking times!
Rebecca Taylor says
I love how you explain everything clearly. Can't wait to try baking chicken breasts!
Amelia Thornton says
The spice blend sounds delicious! I'll definitely give this a go!
James Smith says
I appreciate the clear instructions. Can't wait to make this dish!
Pearl Donovan says
Yum! I’m excited to make this for dinner tonight!
Liam Brown says
The tips you provided are super helpful! Thank you!
Anonymous says
!Great video tutorial too, it really helps me understand better.
Cecilia Montgomery says
'Juicy' is the best word for chicken! Thanks for the tips on seasoning!
Oliver King says
Great recipe! Perfect for meal prep, just what I needed!
James Parker says
I love how quick this chicken recipe is! Perfect for busy days!
Anonymous says
'Fail-proof' makes me feel confident to cook! Thank you for sharing your tips.
Reagan Holt says
This chicken looks so delicious! Thanks for sharing!
Danielle Howard says
I really like that you included tips on cooking time. Very helpful!
Lily Brown says
This recipe looks so easy! I can't wait to try it!
Sophie Lee says
Thanks for the simple steps! I feel confident to make this!
Hazel Monroe says
Wow, this recipe is so easy! Thank you for sharing!
Frances Lily Moore says
Thanks for the tips! I always overcook chicken, so this will help!
Tommy Reynolds says
Yummy! I think my family will love this chicken!
james says
this chicken breast recipe looks so promising! def on my todo list! thanks for it!
hanna says
it looks so juicy from the inside! thanks for the recipe!
Edith Bowman says
I’m excited to make this for dinner tonight! Yummy!
Patricia O’Connor says
Thanks for the video tutorial! It makes everything clearer!
Victoria Hughes says
The seasoning sounds delicious! I’ll definitely give it a try!
Olivia Kate Morgan says
I'm excited to bake chicken breasts for my family. Thanks for sharing!
Linda Matthews says
I'm so glad I found this recipe. It seems foolproof!
Anonymous says
'm excited to add this to my meal prep ideas. Thanks for sharing!
amanda says
looks so yummy